
Mapping OneDrive for Business in File Explorer
Written by Josh Heng onIn this post, I will explain how to map a OneDrive for Business account as a network drive in Windows 10. This method should also work for organisations where the standard OneDrive for Business syncing is disabled as it uses a different protocol.
For this to work, you must use Internet Explorer and not any other browser. If you cannot find Internet Explorer on your system, enable it by reversing the steps from this blog post
Adding a Trusted Site
First, you will need to add Sharepoint as a trusted site. To do this, go to Internet Explorer and press ALT+T then go to Internet Options.
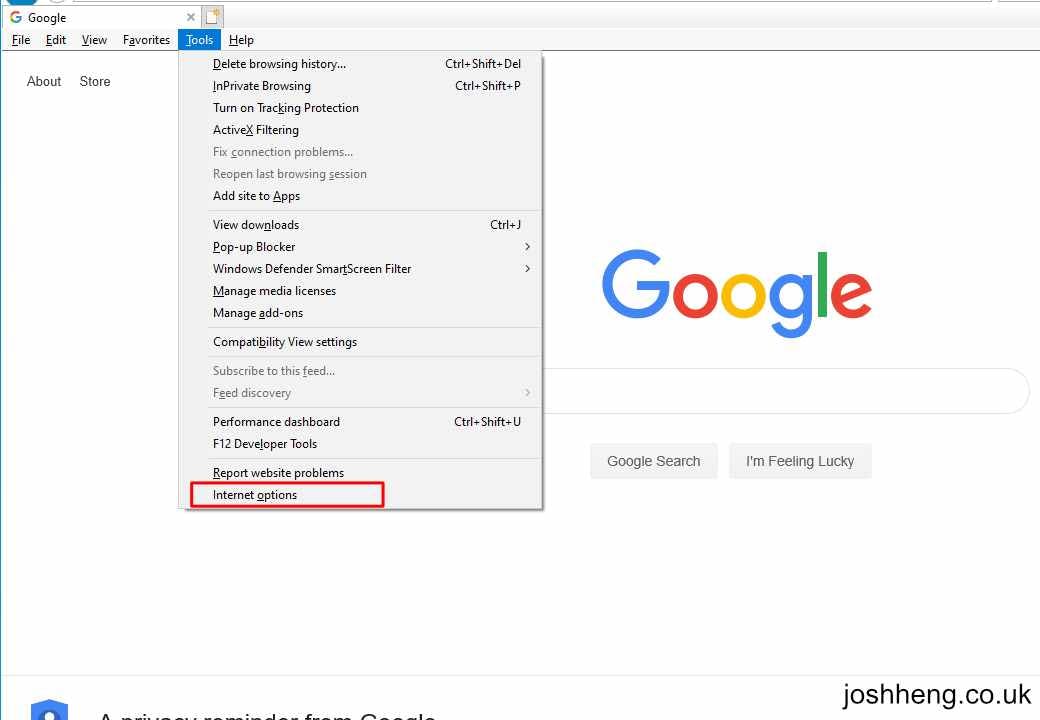
Security tab and click on Sites, then Trusted sites. Add https://*.sharepoint.com to the list.


Logging into Onedrive for Business
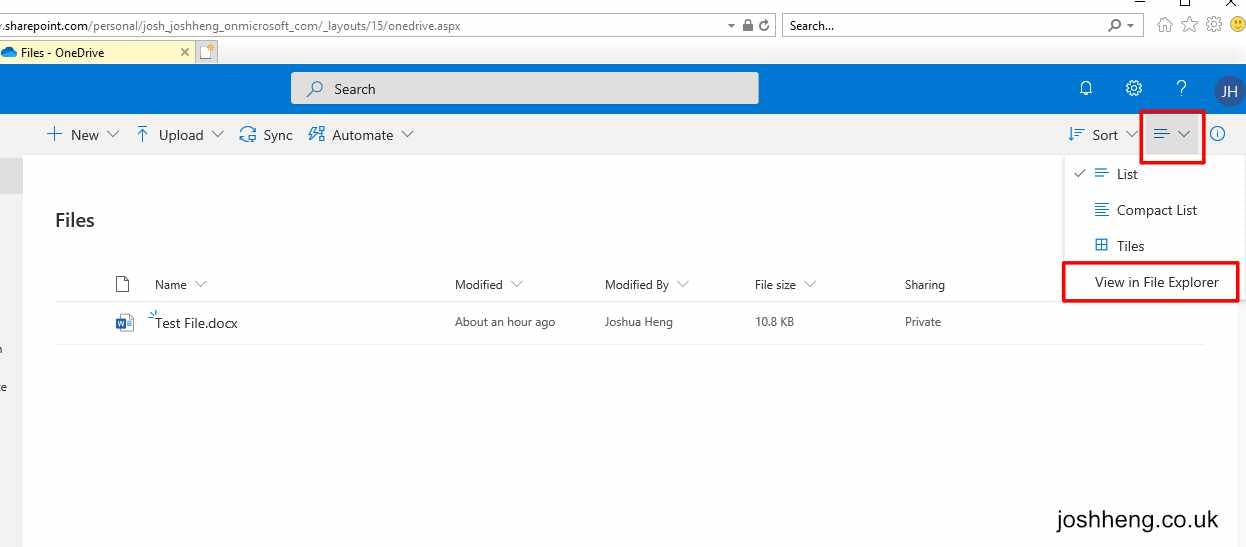
Go to login.microsoftonline.com on Internet Explorer and log into your account as normal, making sure to tick the 'Stay Signed In' box.
Then, click the view button on the right side of the ribbon and click View in File Explorer to open it in on your computer. Make sure to allow all popups if prompted.
Mapping the Drive
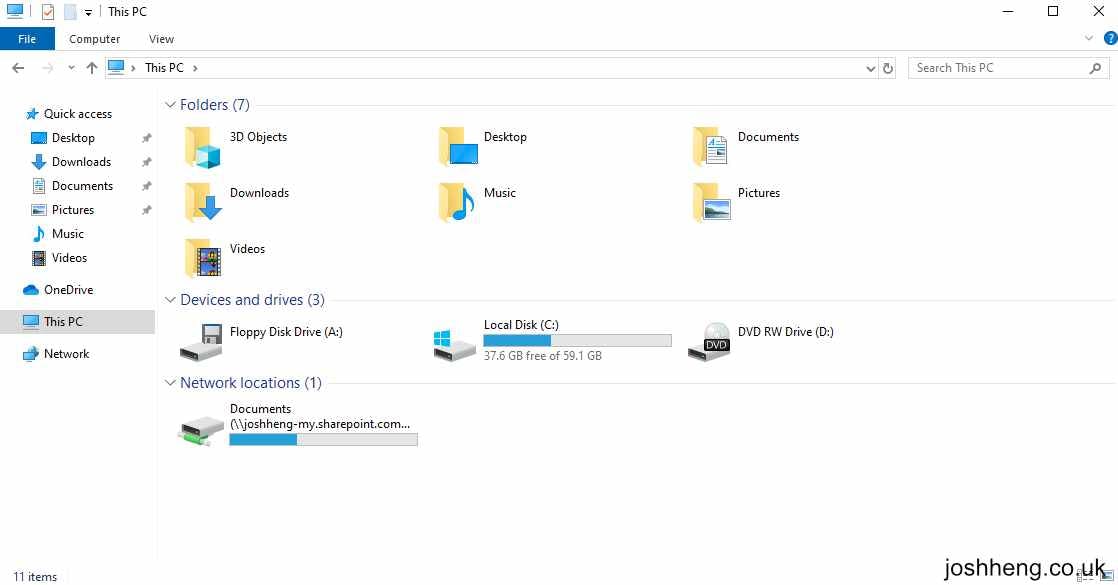
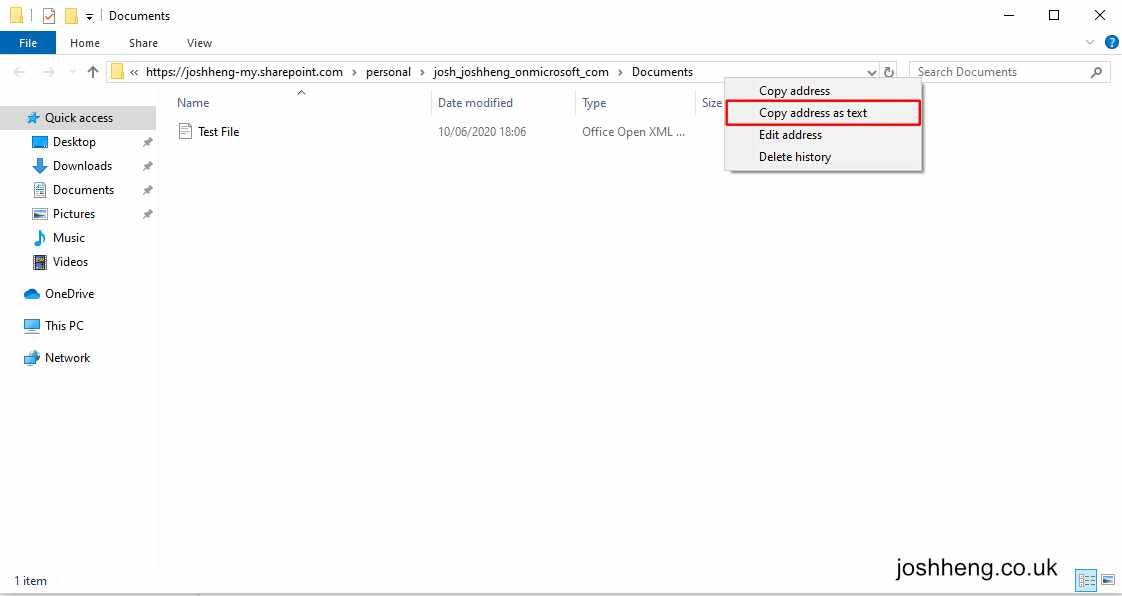
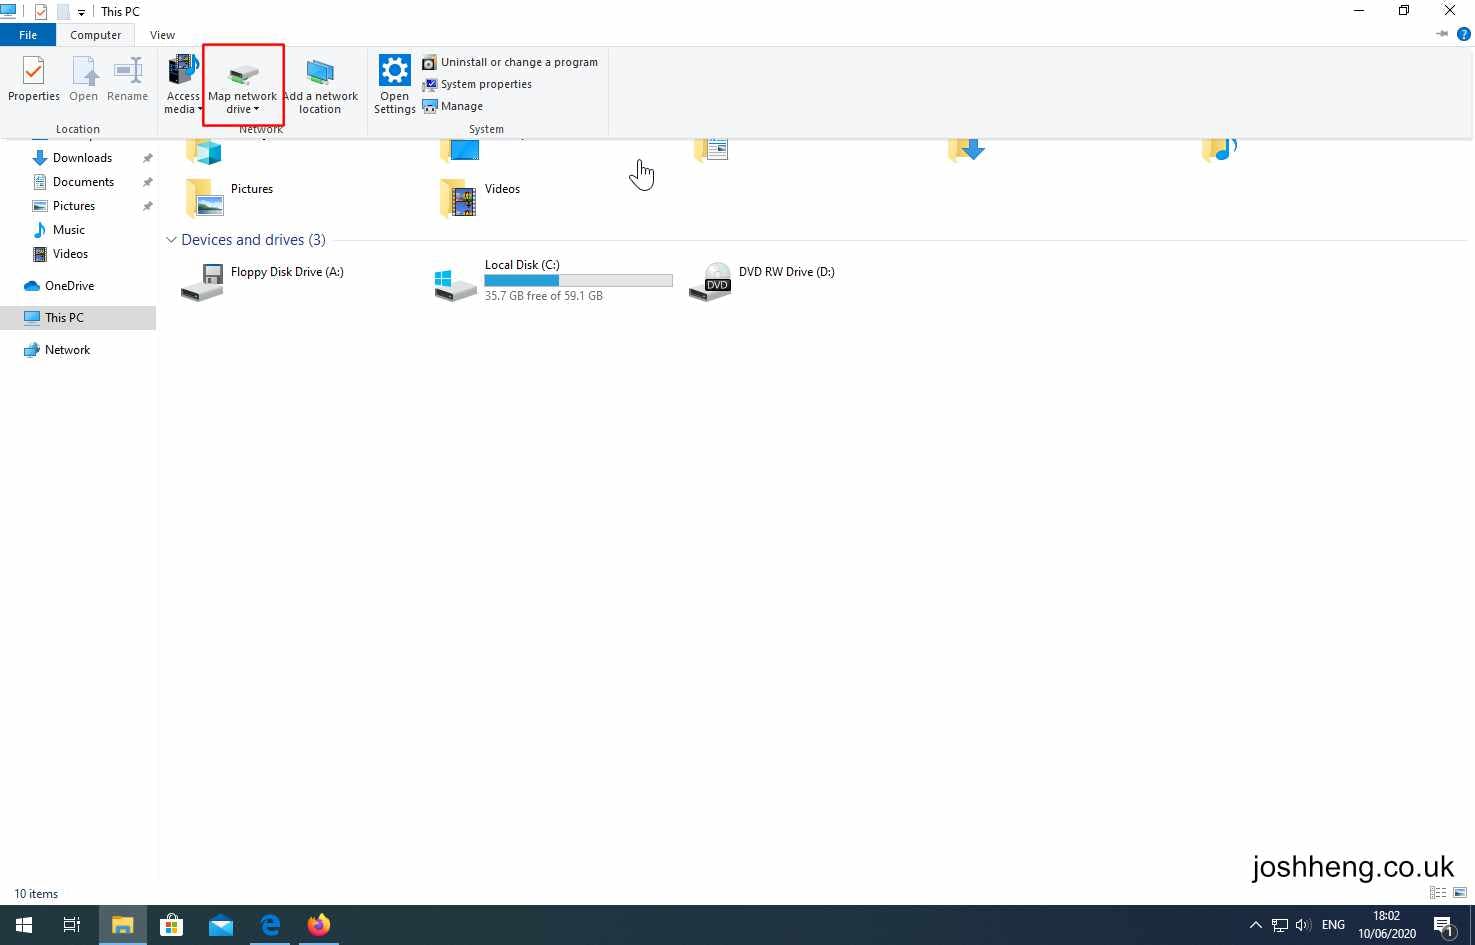
Right click the address bar in File Explorer and click Copy address as text. Then go to 'This PC' and click the Map network drive button in the Computer ribbon.
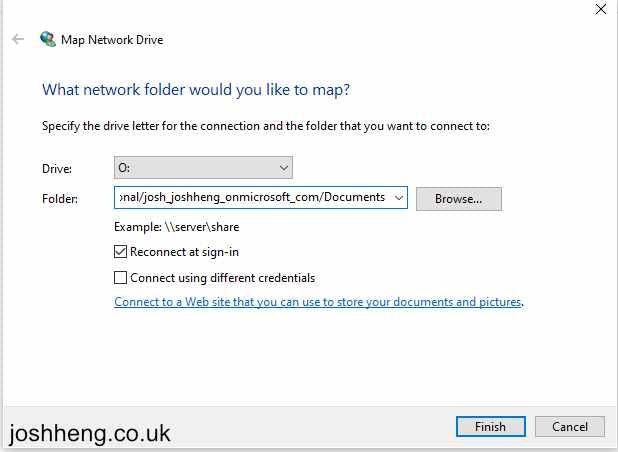
https://[organisation]-my.sharepoint.com/personal/[username]/Documents. Then click Finish, and hopefully the drive should appear as a network location
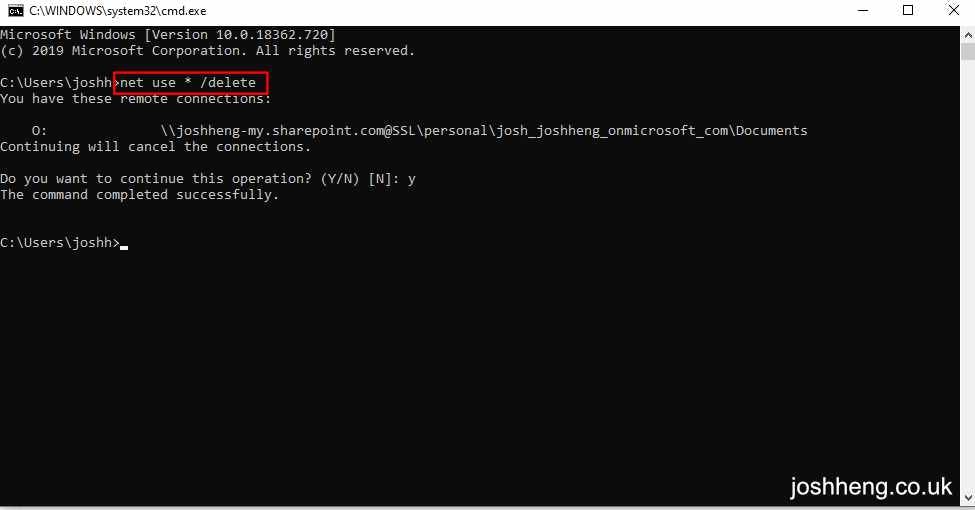
Removing the Drive
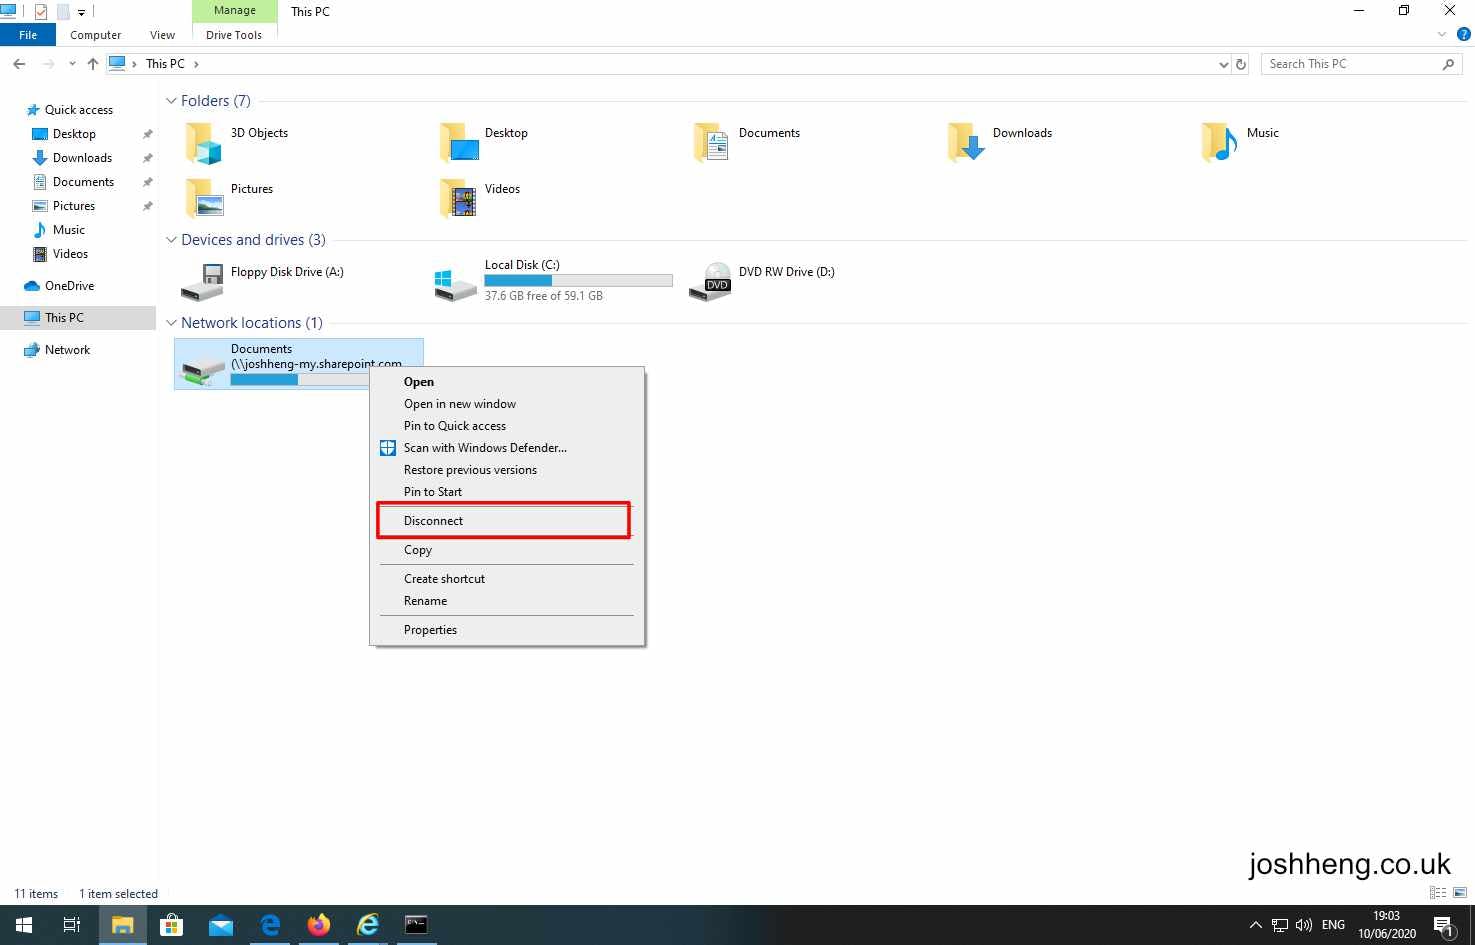
To remove the mapped drive just right click it and select Disconnect.
WINDOWS+R and typing cmd. Then run net use * /delete to delete all drives, or net use O: delete (with the correct drive letter) to delete a certain drive.