


Recording Game Sound in OBS, and Isolating Everything Else
Written by Josh Heng onOpen Broadcaster Software (OBS) is a popular, open source program for recording videos and livestreaming. In this post, I will explain how you can isolate your audio sources in OBS using the free program Voicemeeter Banana in a real life example - only recording Minecraft sounds whilst playing music on Spotify.
Prerequisites
- Windows 10 PC with administrator privileges
- Basic knowledge of OBS Studio. This blog assumes you already have a basic, working scene
Voicemeeter Banana Installation
To begin, install Voicemeeter Banana from their website. You only need the EXE file (the second option) and must reboot your computer after installation.
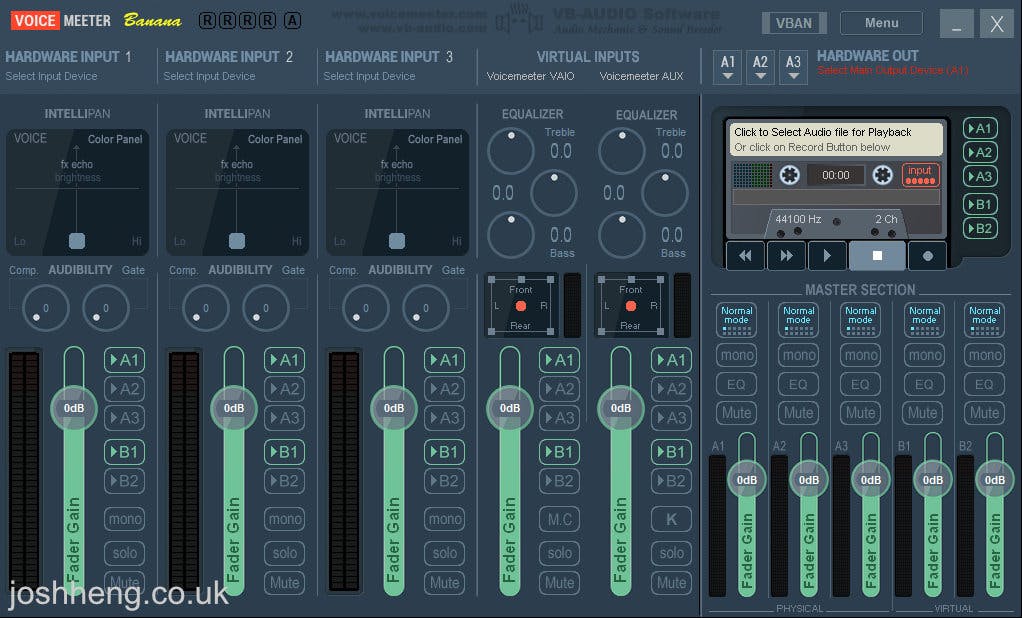
Once your computer has restarted, open Voicemeeter from the start menu. You should be greeted with a window similar to this:
At first it can look complicated, but that's because it can do so much more than we will be using it for. If you would be interested in another post on other functionalites such as wireless audio transmission or piping different inputs to different outputs, leave a comment below!
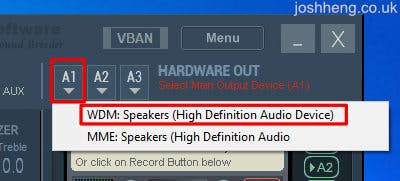
The first thing to do is to sort out the output. Do this by clicking A1 on the top right, and select the speakers or headphones that you are using. If there is a choice between WDM and MME, go with WDM.
- We will pipe all audio through this software through two different inputs. All we are using Voicemeeter for is the fact that we can have two distinct inputs, one of which we can set OBS to use
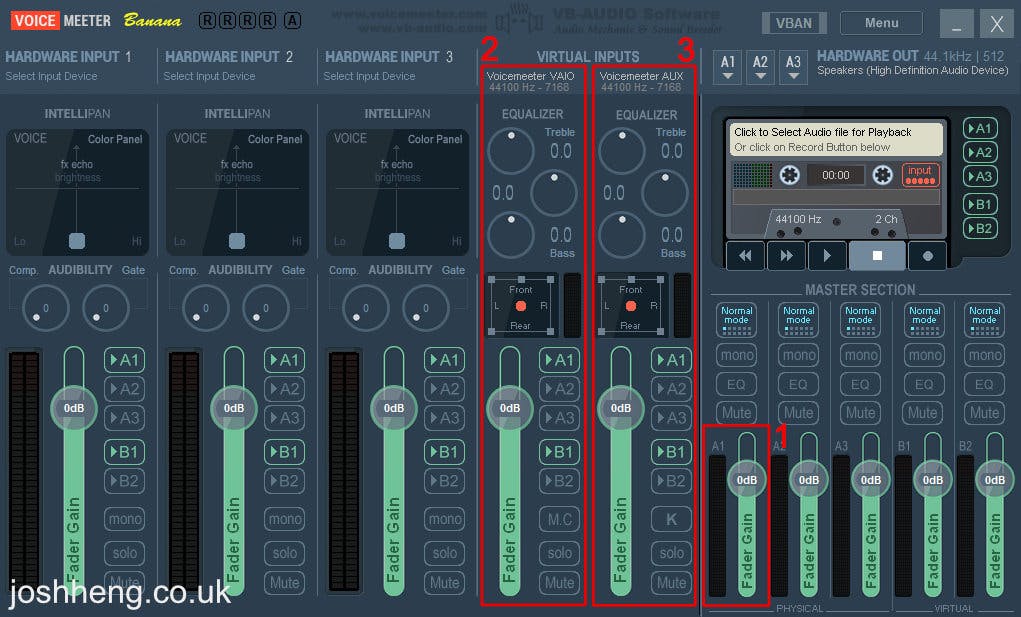
- Item 1 is the master fader. This controls the master volume for your speakers/headphones
- Item 2 is the normal
Voicemeeter VAIO virtual input. We will use this for all our normal computer sounds - the ones we don't want to hear in OBS - Item 3 is the secondary
Voicemeeter AUX virtual input. We will use this for Minecraft - the program we want to hear in OBS
App volume and device preferences menu by:
- Right clicking on the speaker icon in the bottom toolbar
- Clicking
Open Sound settings - Scrolling down and opening
App volume and device preferencesunderAdvanced sound options


Here, we can set the output of the master volume and any apps individually. Set the master volume output to VoiceMeeter Input, and the program you would like to use in OBS to VoiceMeeter Aux Input.

Voicemeeter AUX input, and all other sounds should show up on the Voicemeeter VAIO input. These should both combine in the output on the right.

Voicemeeter AUX input:
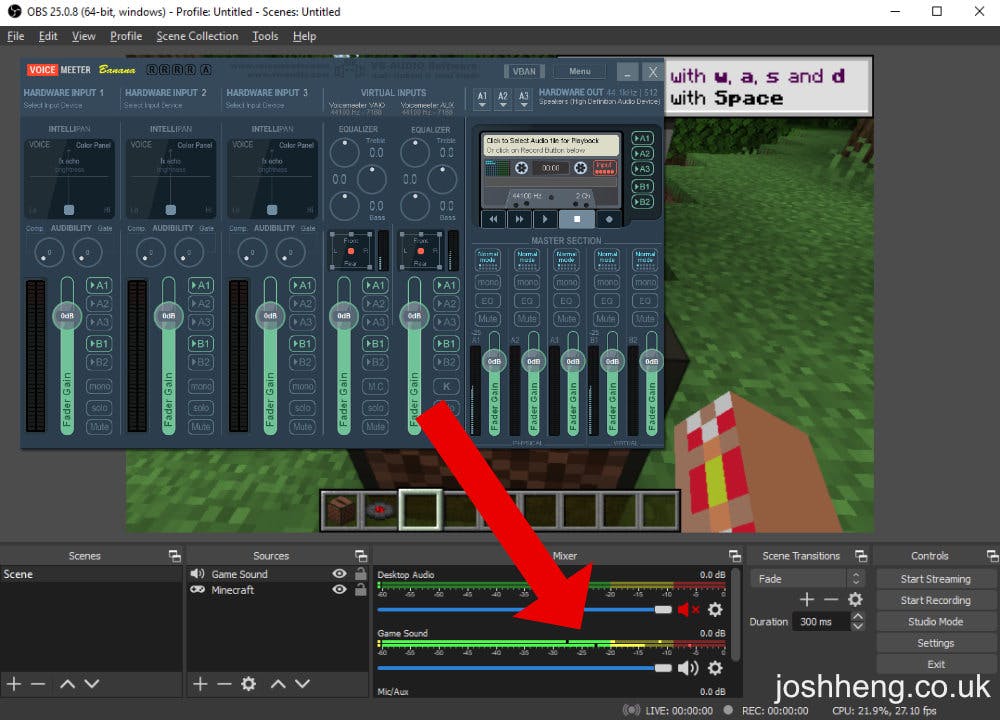
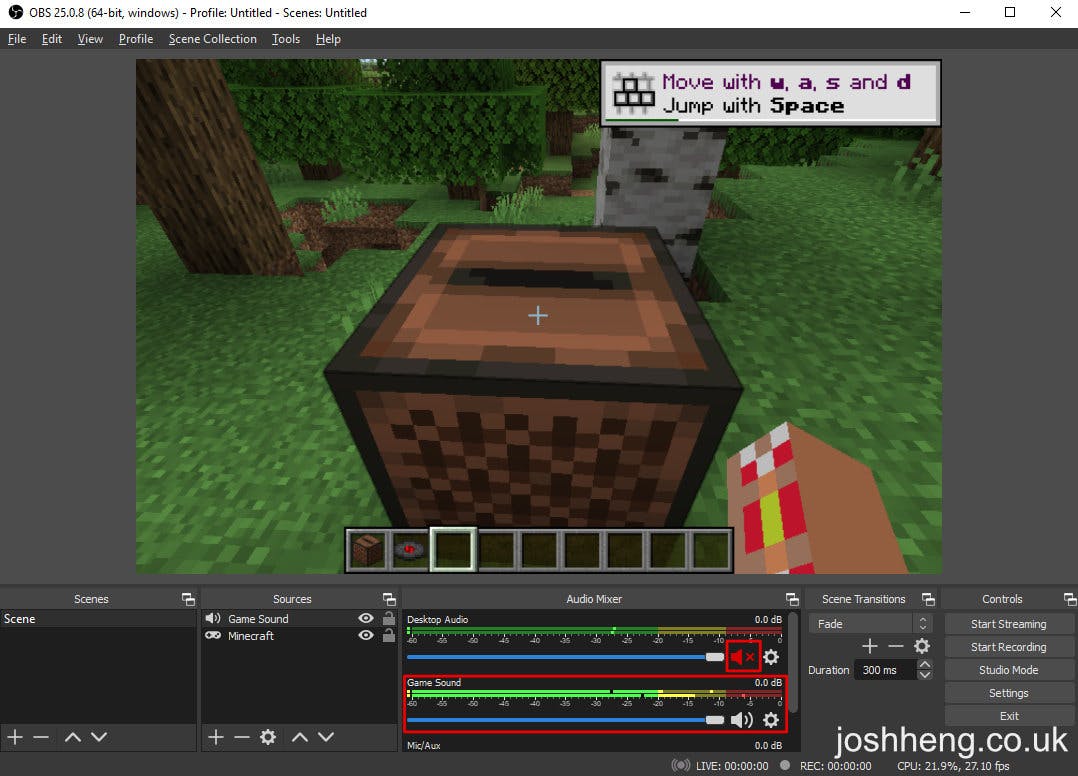
- Create a new source in your scene
- Set this source to
Audio Output Capture - Set the device to
VoiceMeeter Aux Input


Finally, mute the default Desktop Audio source in the Audio Mixer.
Closing Down
When you're finished, simply close Voicemeeter and switch your audio settings back to default in Windows.